What Watercolor Layering Actually Means
Layering in watercolor isn’t flashy it’s a slow build. You’re putting down color in thin, translucent washes, each one adding a little more weight, shape, and story to the piece. It’s not about hiding the paper. It’s about letting light pass through, bounce off the white underneath, and reflect back up with a glow that only transparency can deliver.
But here’s the catch: that same transparency is what makes layering tricky. You can’t just pile on paint. Every layer has to work with what’s already there. Go too fast, and you’ll lift what you laid down. Wait too long, and you lose the wet edge that helps colors blend cleanly.
Timing between washes is half the battle. You need to know when to stop, when to wait, and when to go back in. Watch the shine on the paper it tells you whether it’s still workable or needs more time. Rushing through that moment can flatten your depth or fray your edges.
In short: layering is a quiet discipline. When done right, it makes your painting feel alive without over explaining itself.
Core Techniques for Smart Layering
Watercolor doesn’t forgive carelessness, especially when it comes to layering. Knowing your techniques not only helps you manage paint and water, but also gives you creative control over your results. Here’s how to make every layer count.
Wet on Dry vs. Wet on Wet
Choosing between wet on dry and wet on wet is about deciding what level of control you want:
Wet on dry gives you clean, defined edges. Ideal for precise shapes, shadows, or adding detail.
Wet on wet creates soft blends and fluid transitions. Great for skies, backgrounds, or early color fields.
Tip: Many successful paintings use both techniques start loose with wet on wet, then sharpen with wet on dry.
Avoiding Overworked Paper
Watercolor paper has limits. Layering too quickly or too often can break down the surface, leaving harsh textures or lifting earlier washes unintentionally.
To avoid this:
Allow layers to dry fully before adding more.
Use a soft brush for layering to avoid disturbing lower layers.
Pause often. Fewer, more intentional layers usually produce better color depth and clarity.
Building Texture and Mood With Feathering and Glazing
Once you’re comfortable layering basic shapes, use these advanced techniques to bring atmosphere and depth:
Feathering involves dragging pigment gently outward with a damp brush to create a natural fade. Perfect for fog, shadows, or rounded forms.
Glazing places a translucent wash over a dried layer, altering tone without covering detail. This adds richness, subtle hue shifts, and visual warmth.
Both techniques rely on patience and controlled water flow key skills that elevate your work from flat to dimensional.
Layering isn’t just about stacking color. It’s about making each decision matter a blend of timing, technique, and vision.
Sequence That Matters
In watercolor, the order you work in isn’t just a technical preference it’s the backbone of the entire painting. Starting with light values and slowly building toward darker tones gives you control, flexibility, and room to correct mistakes. Think of each layer as a foundation for the one that follows. Blow past the lights too quickly, and you lose the chance to build form and contrast.
Planning your color blocks and value shifts before brush meets paper avoids the headache of muddy corrections later on. Know where your highlights live. Know what areas should stay untouched. If you’re just winging it, the end result often reflects that.
And here’s the bit most beginners want to skip: let your layers dry. Fully. This isn’t busywork it’s strategy. Letting the paper rest before each pass prevents bleeding, protects the transparency of earlier layers, and keeps color crisp. Watercolor isn’t just about painting it’s about waiting. If that feels slow, good. Slowing down is part of learning control.
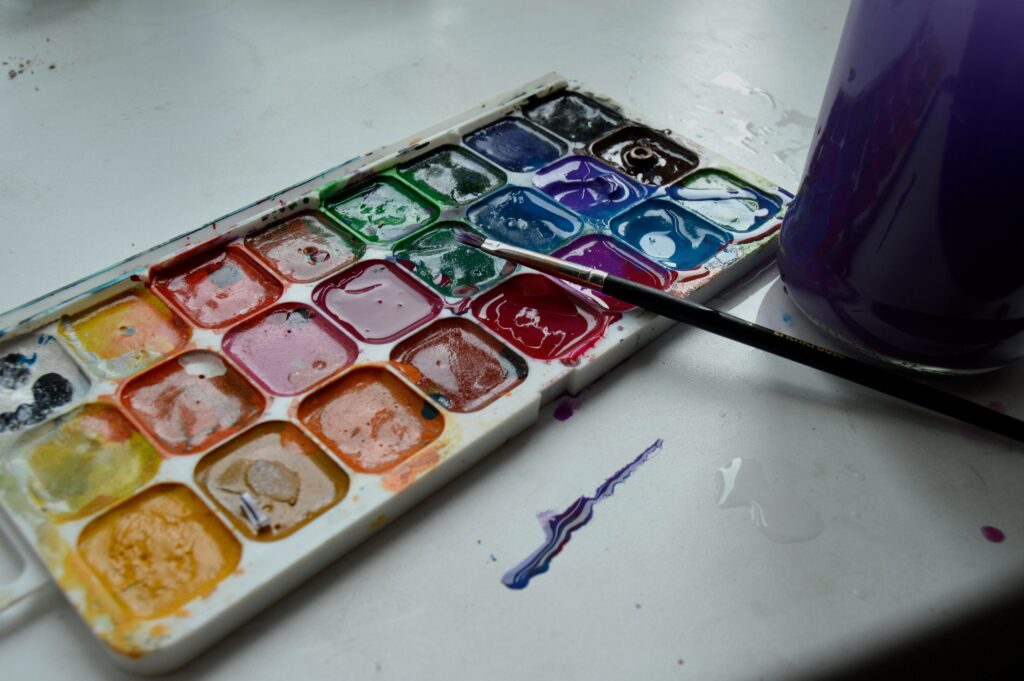
Must Know Tools That Help

The tools you pick can build or break your layers. First, paper. Not all sheets are created equal. Look for 100% cotton watercolor paper ideally 300 gsm (140 lb) or heavier. This kind of paper lets you go in for multiple washes without buckling, tearing, or turning into a sad, soggy mess. Cold pressed offers texture and a little forgiveness; hot pressed is smoother and better for crisp detail.
Next up: brushes. You want ones that can hold water but still give you control. Synthetic blend brushes are solid all rounders, giving you spring, snap, and absorbency without the mess or price tag of pure sable. Go for rounds and flats in a few different sizes and get comfortable with how much water they carry.
And here’s the deal water control matters more than the brand of paint in your tray. It affects how colors layer, lift, bleed. Understanding how wet your brush, paper, and pigment are at any moment is the invisible skill behind successful layering.
Want to push further with your tools? Check out 10 Advanced Brush Techniques Every Painter Should Know.
Avoiding Common Layering Mistakes
Watercolor layering is a subtle art that requires balance too little and the painting feels flat, too much and it becomes muddy or confusing. Here are the most common pitfalls to watch for, along with how to avoid them.
Unintentional Lifting
One of the biggest frustrations for watercolor artists is lifting when new layers pick up or disturb dry ones underneath. This usually happens when the previous layer isn’t fully dry or when too much scrubbing is involved.
Allow each layer to dry completely before adding the next
Use a soft brush with minimal pressure when layering
Avoid overworking any one area, especially on thinner paper
Losing Contrast Through Over Layering
Watercolor thrives on contrast and luminosity. Piling on too many layers can dull colors and flatten the visual impact of your work.
Limit the number of layers, especially on delicate sections
Evaluate contrast values as you go less is often more
Step back often to assess whether areas need more depth or simply clarity
Creating Mud: When Color Mixing Goes Wrong
The dreaded “mud” occurs when too many colors are layered without a plan. Instead of richness, you get murky, undefined hues that sap vibrancy.
Stick to a limited palette that harmonizes well
Be cautious mixing more than two or three pigments in one area
Clean your brush regularly to avoid unintentionally dragging extra pigment across the painting
By being intentional and observant, you can prevent these common mistakes and let your layers work together building clarity, depth, and visual harmony.
Applying Layering to Real Projects
When it comes to putting watercolor layering into action, three types of subjects truly benefit: landscapes, portraits, and abstracts. Each requires a different mindset, but the power of controlled transparency ties them together.
Landscape Skies with Depth and Light Transitions
Painting skies isn’t just about throwing down some blue. It’s about telling time sunrise, storm, late afternoon haze. Start with diluted color for the base tones, then build successive layers to suggest light shifting or clouds rolling through. Let each layer dry fully before adding the next. This patience gives the sky atmosphere without muddling everything into gray.
Portraits with Expressive Skin Tones Built in Layers
Skin isn’t one flat tone it’s dozens of subtle variations. Begin with a light undertone wash, then slowly introduce glazes of pinks, ochres, and neutrals. Build around features like cheekbones, the nose, and under the eyes. This builds depth and emotion without looking caked or artificial. Layering allows facial expressions to feel lifelike, not like they’re blocked in with makeup.
Abstract Washes That Evolve Visually Over Time
Abstract watercolor is where layering shows its raw power. Start with loose, light washes and make decisions as you go. Add shapes, textures, or new colors in layers that slightly overlap or push against each other. Let drying time be a rhythm, not a chore. The result? Work that feels like it’s still moving, even when it’s dry.
No matter the subject, layering gives your watercolor work breathing room and emotion. And the more you do it, the more finesse you develop.
Keep Practicing Here’s Why
Layering isn’t magic it’s muscle memory. Every stroke teaches you something: how your paper responds, how pigment settles, how timing changes everything. Start sloppy if you need to. Consistency beats perfection.
Repetition builds rhythm. You learn when it’s too wet, when it’s just right, and when to walk away so the paper can dry. Over time, those little hesitations should I add another layer or not? become cleaner calls.
Even the mistakes matter. Backruns, cauliflower blooms, unintended mixing they all show you where your timing was off, or where your brush carried too much water. With enough passes, even those “happy accidents” can turn into intentional effects. That’s where flow lives: not in tight control, but in learning how to course correct mid paint.
In 2026, modern artists are layering with attitude. Think metallic underwashes peeking through neutrals, digital sketches printed on watercolor paper and finished with translucent glazes, or mixing traditional brushwork over AI generated pattern grids. The rules aren’t vanished they’ve just become more flexible. But the basics still win: clean water, deliberate layers, and knowing when to stop.
 Kaelith Zelthanna is the kind of writer who genuinely cannot publish something without checking it twice. Maybe three times. They came to art trends and movements through years of hands-on work rather than theory, which means the things they writes about — Art Trends and Movements, Painting Techniques and Tutorials, Art Gallery Highlights, among other areas — are things they has actually tested, questioned, and revised opinions on more than once.
That shows in the work. Kaelith's pieces tend to go a level deeper than most. Not in a way that becomes unreadable, but in a way that makes you realize you'd been missing something important. They has a habit of finding the detail that everybody else glosses over and making it the center of the story — which sounds simple, but takes a rare combination of curiosity and patience to pull off consistently. The writing never feels rushed. It feels like someone who sat with the subject long enough to actually understand it.
Outside of specific topics, what Kaelith cares about most is whether the reader walks away with something useful. Not impressed. Not entertained. Useful. That's a harder bar to clear than it sounds, and they clears it more often than not — which is why readers tend to remember Kaelith's articles long after they've forgotten the headline.
Kaelith Zelthanna is the kind of writer who genuinely cannot publish something without checking it twice. Maybe three times. They came to art trends and movements through years of hands-on work rather than theory, which means the things they writes about — Art Trends and Movements, Painting Techniques and Tutorials, Art Gallery Highlights, among other areas — are things they has actually tested, questioned, and revised opinions on more than once.
That shows in the work. Kaelith's pieces tend to go a level deeper than most. Not in a way that becomes unreadable, but in a way that makes you realize you'd been missing something important. They has a habit of finding the detail that everybody else glosses over and making it the center of the story — which sounds simple, but takes a rare combination of curiosity and patience to pull off consistently. The writing never feels rushed. It feels like someone who sat with the subject long enough to actually understand it.
Outside of specific topics, what Kaelith cares about most is whether the reader walks away with something useful. Not impressed. Not entertained. Useful. That's a harder bar to clear than it sounds, and they clears it more often than not — which is why readers tend to remember Kaelith's articles long after they've forgotten the headline.